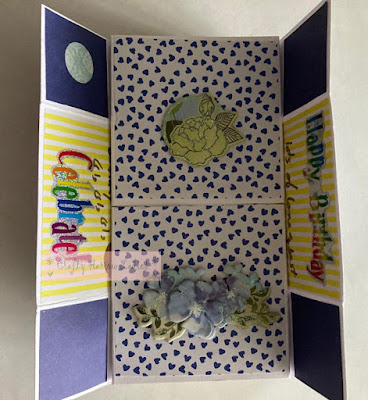
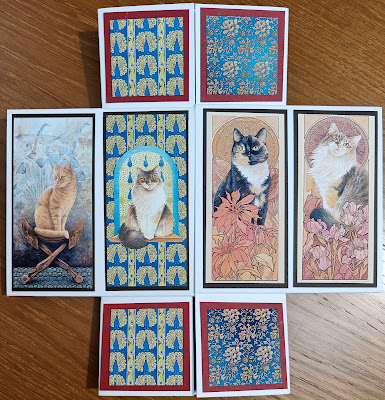
We recently had a go at infinity cards. These look incredibly complex, but they're really not. They do take a long time to decorate! To keep the arithmetic simple, I suggest making cards either 8in or 6in square. You need to be able to cut and score halves and quarters of those measurments.
You start with four pieces of card, each 8in by 4in or 6in by 3in. You score a quarter of the way from each short edge, so at 2in or 1.5in. Note, I've added colours or textures to show different pieces. You can start with any card you like, but a heavyweight (220gsm or heavier), white is probably the simplest.
Take two pieces and lay them out so the score lines follow on and edges are level.
You might find it useful to attach the two pieces with some removable tape, but that's not strictly necessary and will be removed soon.
Put some permanent double-sided tape in each corner of the card. You should make sure that the tape is within the 2in or 1.5in square at the corner.
Take another piece of card, and attach it as shown, lining up the edges and making sure this piece of card is at 90 degrees to the lower layer.
You can remove the removable tape at this point, as your first two pieces of card are now anchored by the third piece.
Add the fourth piece of card alongside the third.
I've added a blue line here to denote where the split in the top layer is. The split in the lower layer is horizontal. You've now completed the structure of the card. The next step is to fold.
Lift the card to face you as shown. Feel behind to where there are vertical score lines, you need to open the split at the front and fold back so you have something like this.
I'm cheating now, as my Photoshop skills aren't good enough to draw what I mean, so I've used a photo of a decorated card I've made. The two narrow panels at the sides have been folded back, gatefold style.
Now, there's another split between the two centre pictures which open up and down. Fold these back at the score lines behind, without folding the picture panels.
Note: the two panels, furthest left and furthest right are the same as the previous layer.
Finally, fold out the centre, vertical split to get this.
This is also the back of your card, but if you open the centre, horizontal split, you get back to the front of the card.
Once you've got the folds in place, go back and sharpen them with a folding tool, scissors handle or ruler. Then, you can decorate the panels.
One wrinkle. If you want everything to be the right way up as you fold through the layers, the back of the card will be upside down relative to the front when the card is closed. If you match back and front while closed, you will come across the last face upside down when you fold through. Apart from choosing decoration that means there is no 'up' or 'down', there's nothing you can do about that.
I hope this all makes sense.
For information, all the images used to decorate this card came from the Joanna Sheen Ivory Cats CDRom and were printed using the sadly discontinued Ryman Matt Photopaper and my basic Canon printer.


